Plot Setup
If you haven't already installed the VSCode extension and the Terracotta Client mod, see Installation.
Don't delete your code!
Always make sure to start with an empty plot. Never run Terracotta on plots made using normal DiamondFire coding because there is no way to recover code Terracotta may overwrite.
Creating a Project
- Choose a plot on DiamondFire to compile to and join it.
- Create a folder to hold all your plot's code and open it in VSCode.
- From the Run and Debug menu, click
create a launch.json fileand selectTerracottafrom the list of langauges.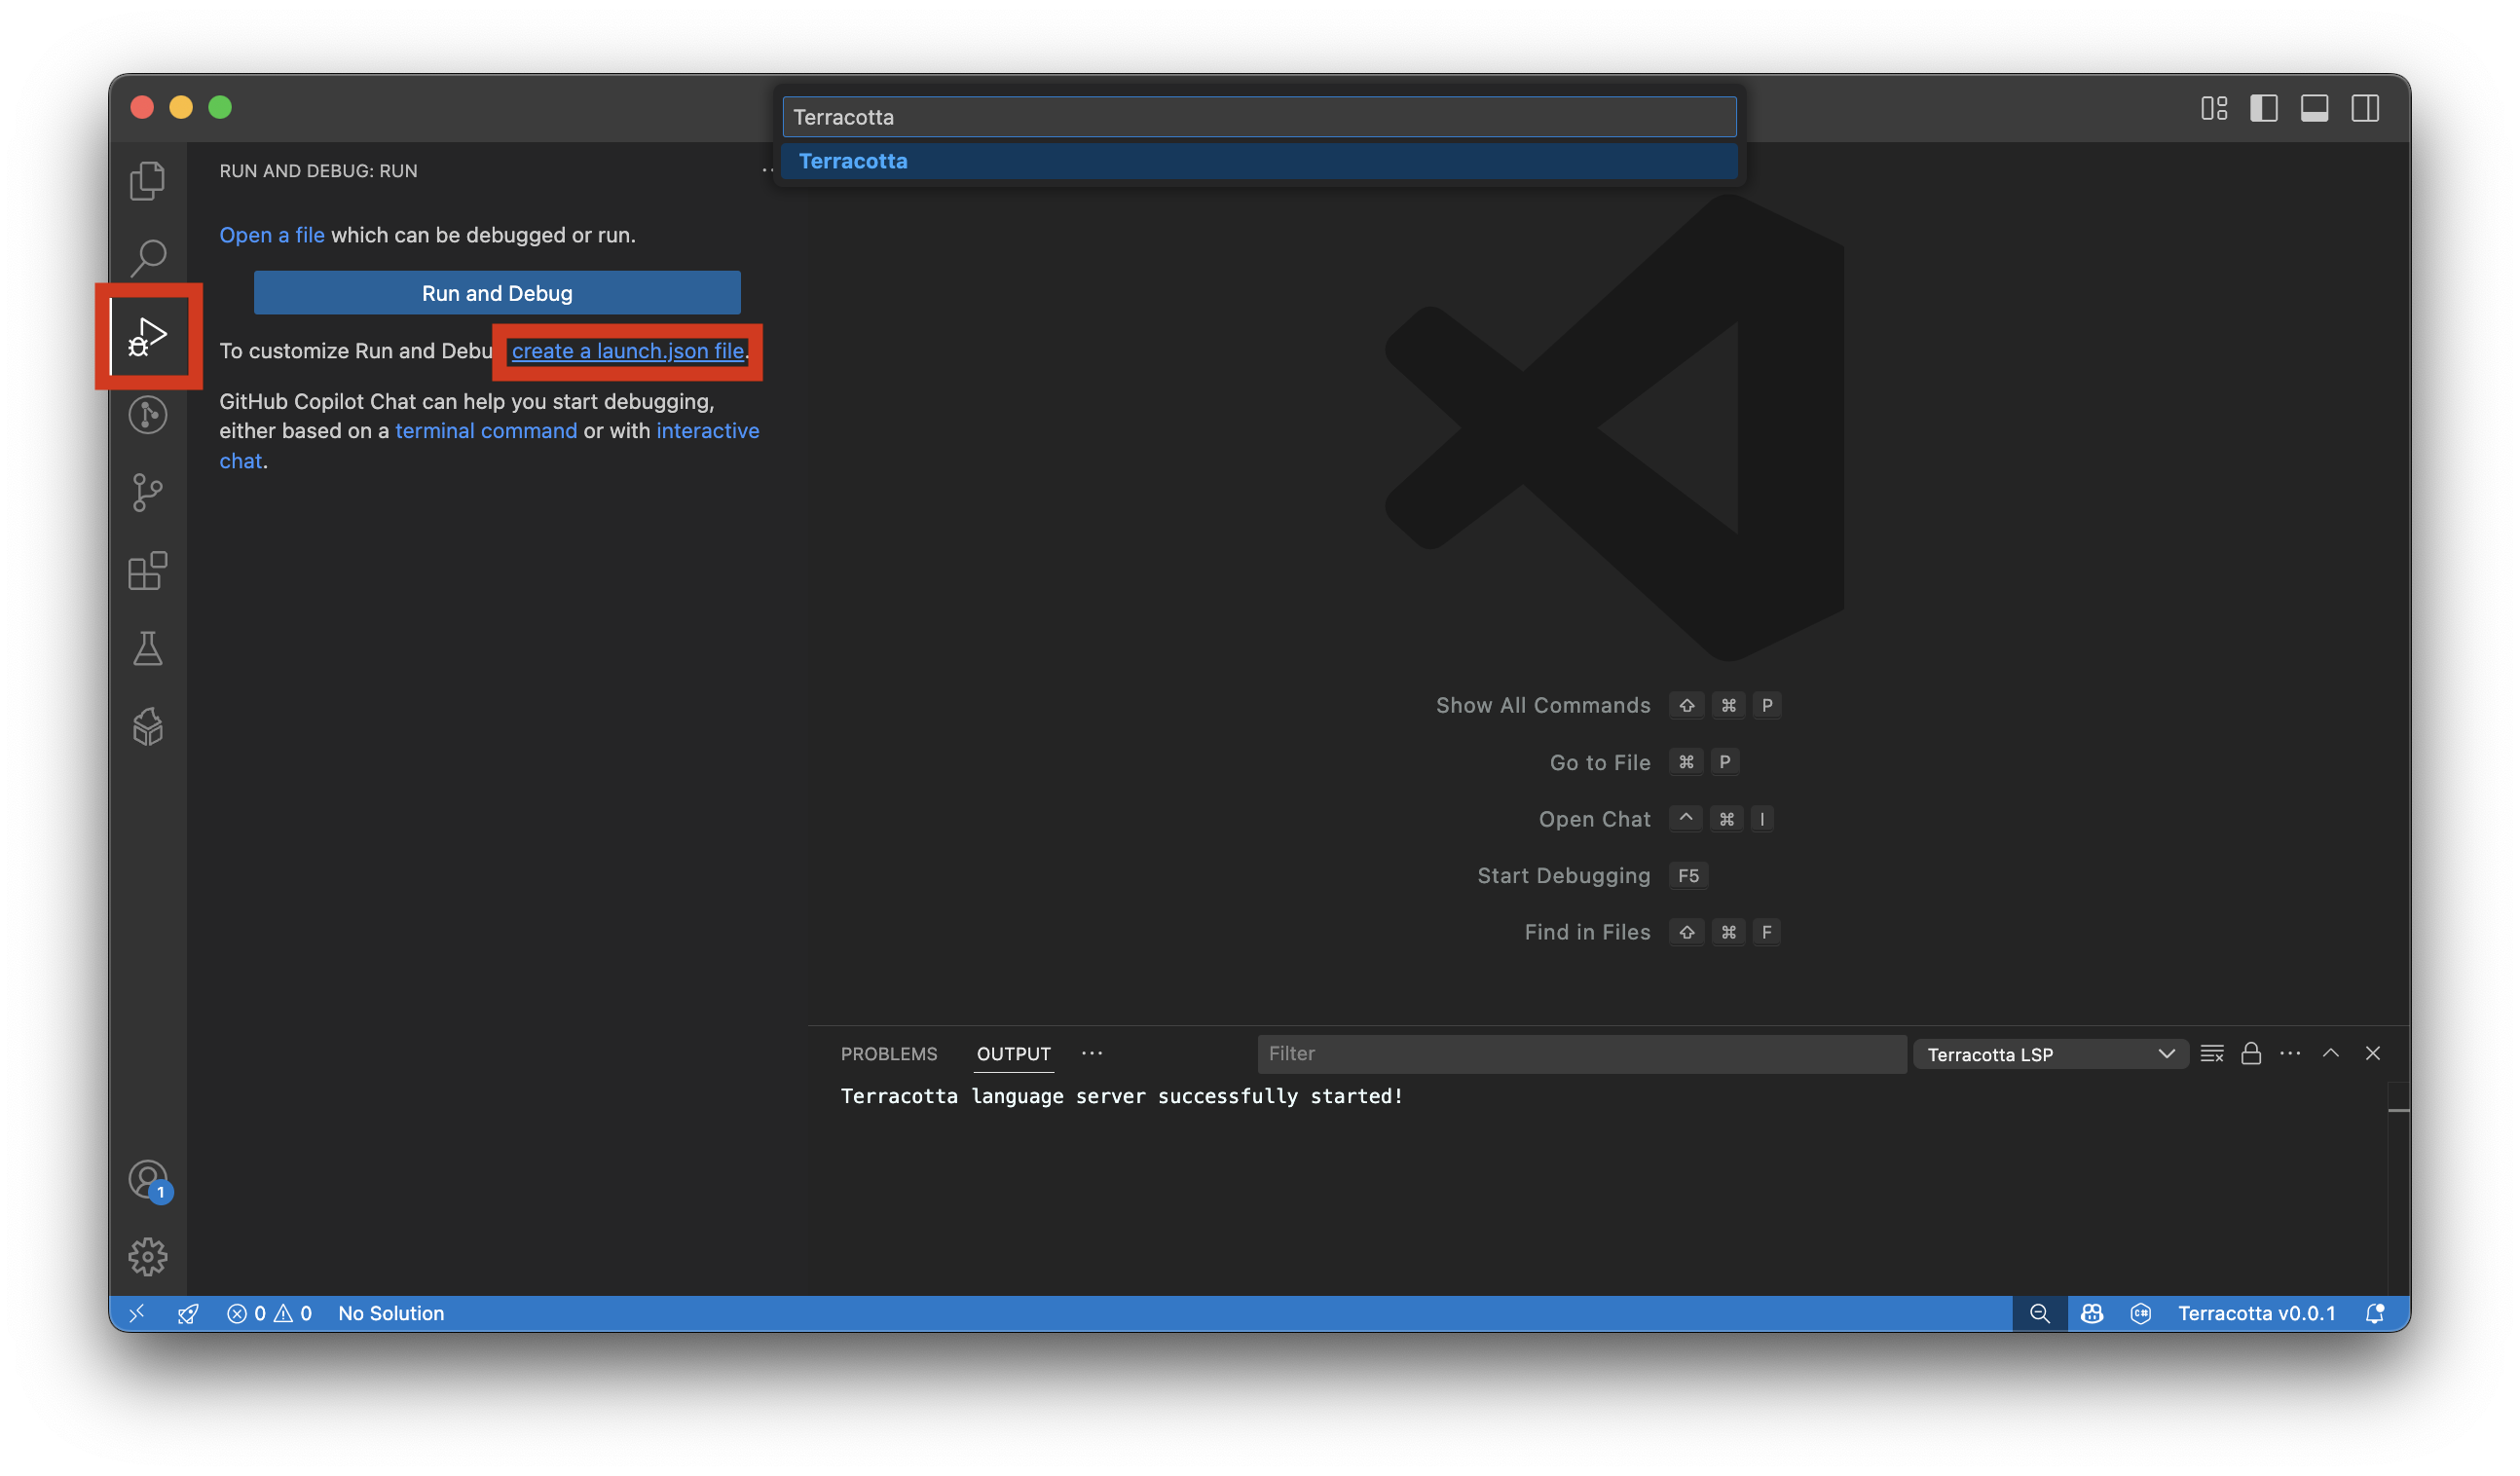
- In the newly created
launch.jsonfile, make sure to setplotSizeappropriately for the plot you will be compiling to.
| Plot Type | Plot Size |
|---|---|
| Basic | 50 |
| Large | 100 |
| Massive | 300 |
| Mega | 300 |
| World | 300 |
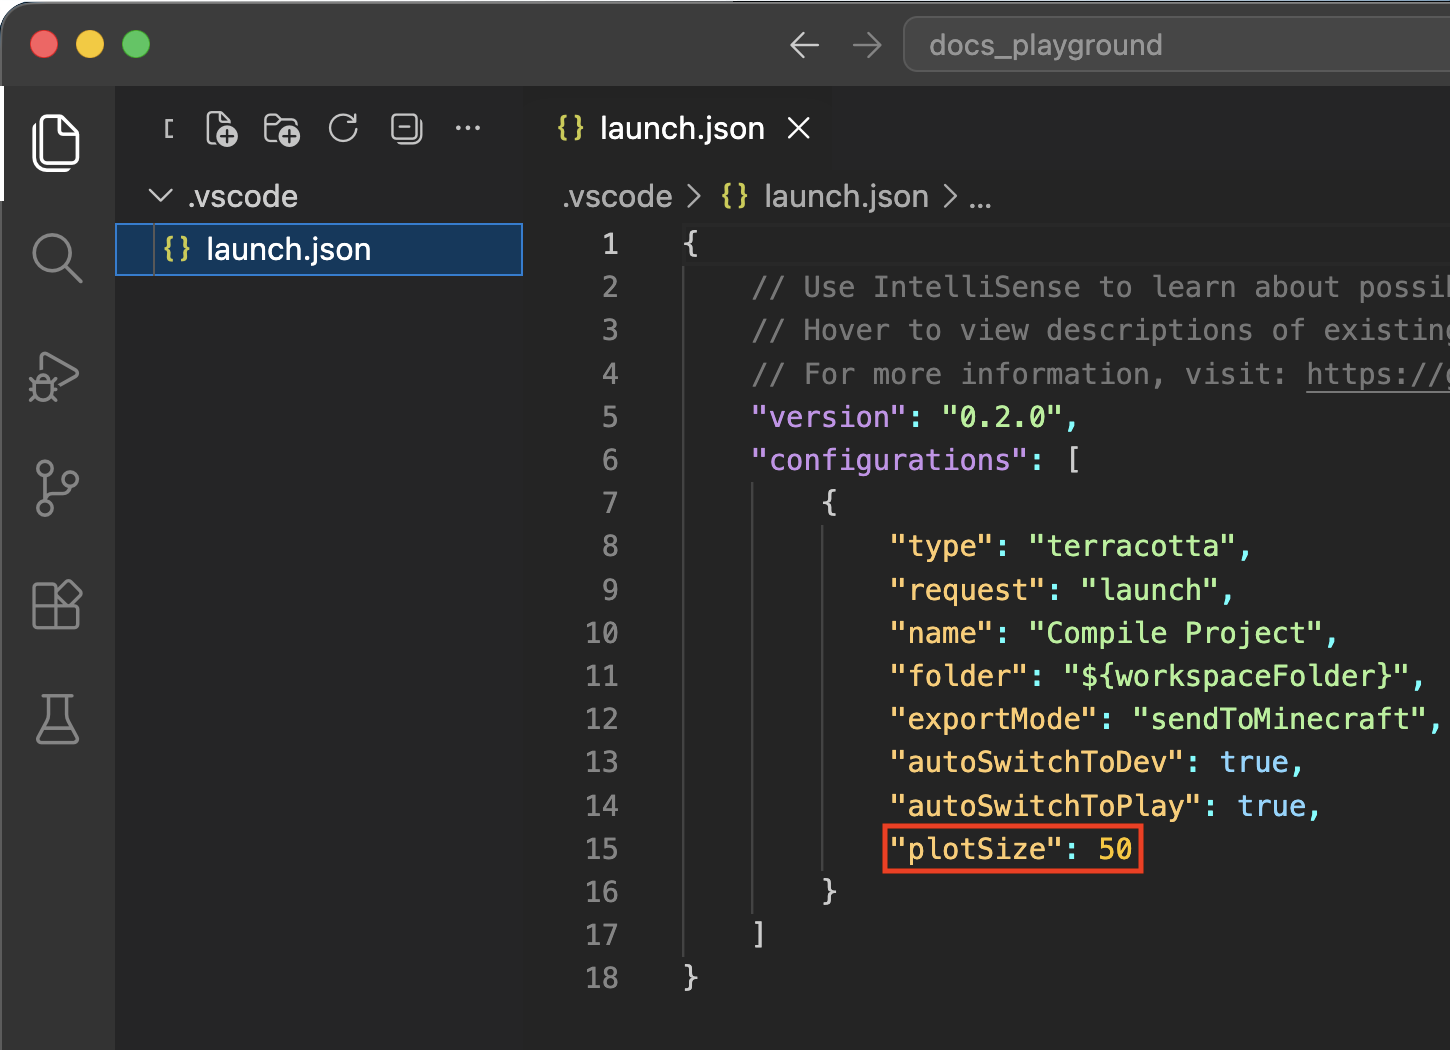
All launch.json parameters and what they do
folder: The folder to compile. This should almost always be set to"${workspaceFolder}".exportMode: Can be either"sendToMinecraft"or"saveToFiles"."sendToMinecraft": When running, automatically place compiled templates via Terracotta Client."saveToFiles": (CURRENTLY UNIMPLEMENTED!) When running, save all compiled templates to files.
autoSwitchToDev: If in play or build mode upon compiling, automatically enter dev mode. If left disabled, trying to compile while in build or play mode will fail. Only applies ifexportModeis"sendToMinecraft".autoSwitchToPlay: Automatically enter play mode after all compiled templates have been placed.plotSize: Used by the codeline splitter to know what length templates should be limited to. If you want to "disable" the codeline splitter, just set this to a very high number.plotIds: An array of plot ids. If present, an error will be thrown when trying to compile to a plot that's not in this list.plotOverrides: Overrides compilation settings when compiling to specific plots. The following properties can be overridden:plotSize,autoSwitchToDev, andautoSwitchToPlay.
Limit what plots you can compile to!
It's highly recommended to add the "plotIds" parameter to your launch.json. This will prevent you from accidentally hitting compile on the wrong plot and deleting code!
Compiling a Project
Terracotta script files have the extension .tc. Create a script in your project folder to test with:
If you can see ✔︎ Connected to MC in the bottom right of VSCode, you are ready to compile.
Press f5 or click the green play symbol at the top of Run and Debug to compile your plot.